Internet connection sharing is essential if you want to use one internet connection for all computers in your network. Setting up of Internet connection sharing depends on OS of your computers. With the Internet Connection Sharing (ICS) feature of network and dial-up connections, you can use Windows to connect your network to the Internet. By enabling ICS on the computer that uses the dial-up connection, you are providing network address translation, addressing, and name resolution services for all computers on your network. Microsoft Internet Connection Sharing enables a computer connected to the Internet via a cable or DSL modem to share its connection with other computers connected to it. This kind of sharing might not be the best, but it is cheap because of its minimal hardware requirements and fairly straight forward to set up.
Before setting up the ICS server for a dial-up connection, make sure that you've completed the preliminary steps listed here. Open the Network and Dial-up Connections folder. Then right click the Dial-up connection that you want to share and select Properties.
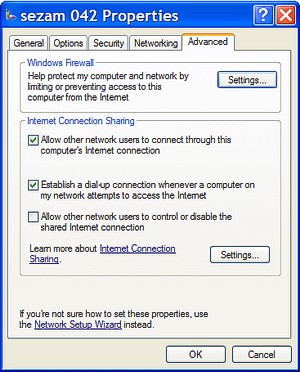
The Properties shows the network components associated with the connection. Click the Advanced tab, then check Allow other network users to connect through this computer's Internet connection. Check Establish a dial-up connection whenever a computer on my network attempts to access the Internet if you want the ICS server to automatically connect to the Internet. Otherwise, you'll have to connect manually whenever any computer wants Internet access. Uncheck Allow other network users to control or disable the shared Internet connection to prevent clients from disconnecting other users from internet.
Click OK. If your local area network adapter already has an IP address assigned, WinXP warns you that it will change it. Click Yes to continue.
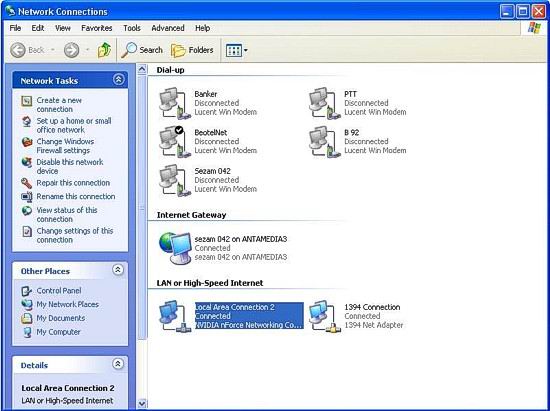
Before you configure clients to be able to share ICS in network, you need make setup on the their network cards, after which they will be able to access to the internet, even if they are not directly connected to the DSL or cable modem. This procedure is pretty painless and essentially the same for all methods of Internet connection sharing. Open the Network and Dial-up Connections folder.
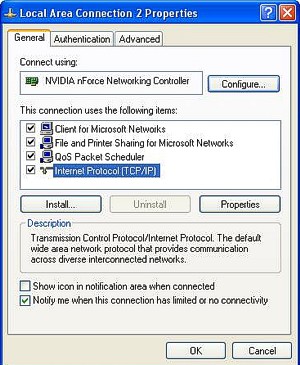
Then right click the LAN or High-Speed Internet connection and press on properties. In new window highlight TCP-IP settings and press the properties button.
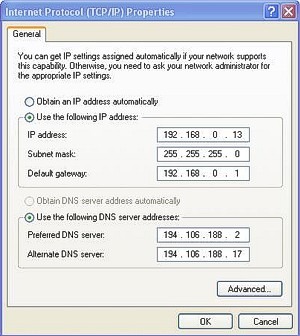
Also, select Use the following DNS server adresses option and set provider DNS.
Press on OK to complete Setup.
Start the Network Setup Wizard. If
the Wizard refuses to run, saying that it can't find a network card,
make sure that your network card is properly installed. If it is, the
driver program for your network card probably doesn't conform to the
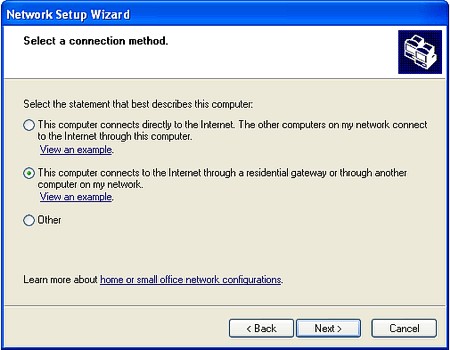
Network Driver Interface Specification (NDIS) standard. Specify This computer connects to the Internet through another computer (the ICS server), and click Next.
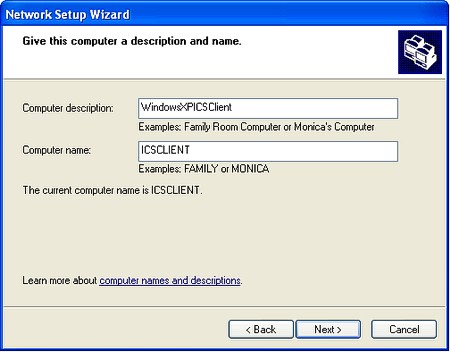
If the client computer has more than one network connection, specify Let me choose the connections to my network and click Next. Type a computer description and computer name. The description appears in My Network Places or Network Neighborhood on other networked computers. The computer name must be unique on the network. For maximum compatibility with all versions of Windows, use 1-12 alphanumeric characters, with no blanks.
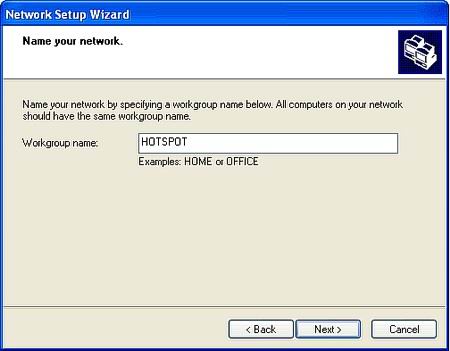
Enter a workgroup name, which should be the same on all of the networked computers. Once again, use 1-12 alphanumeric characters, with no blanks. Be default, the Wizard uses the name MSHOME. If your network uses a different name, enter it here.
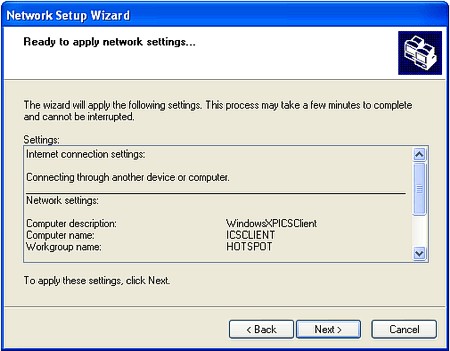
The Wizard displays the settings that you've made. Scroll down the list to see all of them. If you want to change any setting, click Back. To accept the settings, click Next. To stop running the Wizard, click Cancel.
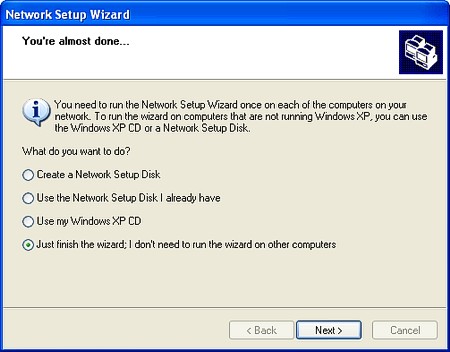
The Wizard then configures the computer's network settings. If the Wizard is running on a Windows XP computer, this screen appears.
Specify Just finish the wizard and click Next. When the configuration is complete, the Wizard's Completion screen appears. Click Finish to exit. If you have any question which is not explained in Manual, feel free to contact us! To download latest versions of our software please go to download section. |

©2001-2007 Antamedia
|